
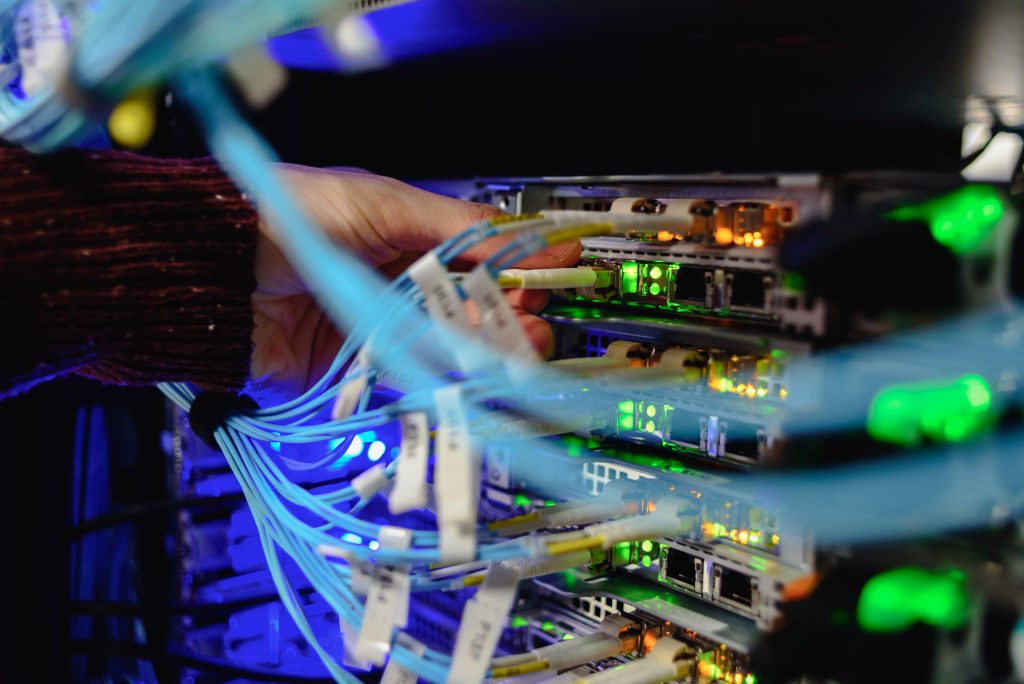
Clean fiber optic cables are the backbone of every reliable network. Even the smallest dust particle or trace of oil can disrupt signal transmission, cause costly downtime, or permanently damage connectors. In fiber optics, cleanliness isn’t optional—it’s the difference between peak performance and network failure.
Whether you’re maintaining a data center, deploying new lines in the field, or splicing fiber for high-speed communication systems, proper cleaning practices ensure your network performs at its full potential. Understanding how to clean fiber optic cables and connectors—and what tools, techniques, and protocols to use—helps prevent signal loss and extends the lifespan of your equipment.
In this guide, we’ll break down:
- Why fiber optic cleaning matters more than you think
- The right tools and materials for every environment
- Step-by-step instructions for cleaning connectors and ports
- Common mistakes to avoid during maintenance
- Proven best practices for long-term network reliability
Keep reading to learn how a few extra minutes of preventive care can protect your investment, eliminate costly signal issues, and keep your network running at full speed.
Why Cleaning Fiber Optic Cables Matters

In fiber optics, even microscopic contamination can have outsized consequences. A single dust particle—smaller than a grain of pollen—can scatter light, weaken signal transmission, and cause noticeable performance drops.
Oil from fingerprints, residue from improper handling, or airborne debris can also lead to signal attenuation or permanent connector damage. These issues often show up as unexplained slowdowns, poor test readings, or intermittent data loss.
Clean fiber connections ensure maximum signal strength and prevent unnecessary downtime. Routine cleaning also protects sensitive components, extending the lifespan of transceivers, adapters, and splicing tools.
For data centers, telecom providers, and enterprise networks, the stakes are even higher. A single contaminated connector can mean thousands of dollars in troubleshooting and productivity loss.
Industry studies highlight the risk: according to Cisco Technical Reports, up to 80% of fiber network failures stem from dirty or damaged connectors.
In short, fiber optic cleaning isn’t just a maintenance task—it’s essential protection for your network’s performance, reliability, and long-term return on investment.
The Critical Role of Clean Connections
In a fiber optic network, even a barely visible contaminant can disrupt the entire link. Dust, oil, or moisture on a connector end-face blocks or scatters light—causing reflection, refraction, and signal loss.
Every connector is a potential failure point. When interfaces aren’t spotless, data transmission becomes inconsistent, increasing the risk of attenuation and return loss. Over time, this can lead to expensive maintenance cycles or even permanent connector surface damage.
Technicians sometimes underestimate how small contaminants can snowball into large-scale network issues. A few particles on one connector may transfer to multiple fibers through repeated connections, spreading contamination across the system.
Clean connections ensure:
- Lower insertion loss and higher signal integrity
- More accurate splicing and testing results
- Extended equipment lifespan and reduced replacement costs
- Stable network performance even under heavy load
According to Cisco Technical Reports, roughly 80% of fiber optic failures trace back to dirty connections. That statistic alone underscores a simple truth—no matter how advanced your equipment is, a clean connector is the foundation of every reliable network.
When and Where Cleaning Is Necessary
Fiber optic cleaning isn’t just for emergencies—it’s a routine step that keeps your network healthy and consistent. Every time a connector is handled, inspected, or reconnected, it should be cleaned and re-inspected before use.
Even brand-new cables can carry dust or manufacturing residue from packaging. A “clean before connect” policy ensures contaminants aren’t introduced into adapters, transceivers, or splicing equipment.
Always clean connectors when:
- Installing or reconnecting fiber cables
- Performing fusion splicing or field terminations
- Conducting network testing or certification
- Replacing transceivers or patch panels
- Handling equipment in dusty, humid, or high-traffic areas
Each environment poses unique challenges.
- Data centers: High connector density increases the risk of cross-contamination between ports.
- Field installations: Dust, wind, and moisture make contamination nearly unavoidable.
- Manufacturing or lab settings: Precision work demands the lowest possible insertion loss—cleanliness directly impacts accuracy.
By standardizing cleaning routines for each workspace, technicians can reduce rework, prevent signal loss, and maintain consistent network reliability.
A few seconds spent cleaning up front can save hours of troubleshooting later.
Common Contaminants
Fiber connectors face more contamination risks than most technicians realize. Even under controlled conditions, microscopic debris can build up quickly and compromise network performance.
The most common contaminants include:
- Dust particles: The number one culprit in fiber optic signal loss. Dust collects during handling or from airborne exposure and can scratch or block the connector end-face.
- Skin oils: Fingerprints are a major source of invisible residue. Even a light touch transfers enough oil to disrupt the light path and cause reflection or attenuation.
- Moisture and condensation: Humidity or temperature shifts can leave microscopic water droplets on the ferrule surface, trapping dust or forming a thin film that weakens transmission.
- Chemical residue: Solvents, adhesives, or cleaning solutions used incorrectly can leave a film that scatters light or damages the connector over time.
- Cross-contamination: A dirty connector mated with a clean one can instantly spread debris to both sides—multiplying problems across your network.
Cleanliness is especially challenging in field installations, where dust and moisture are constant. That’s why inspection, cleaning, and re-inspection must be built into every handling routine.
Consistent cleaning habits not only prevent contamination but also protect fiber end-faces from scratches, reduce signal loss, and extend equipment life.
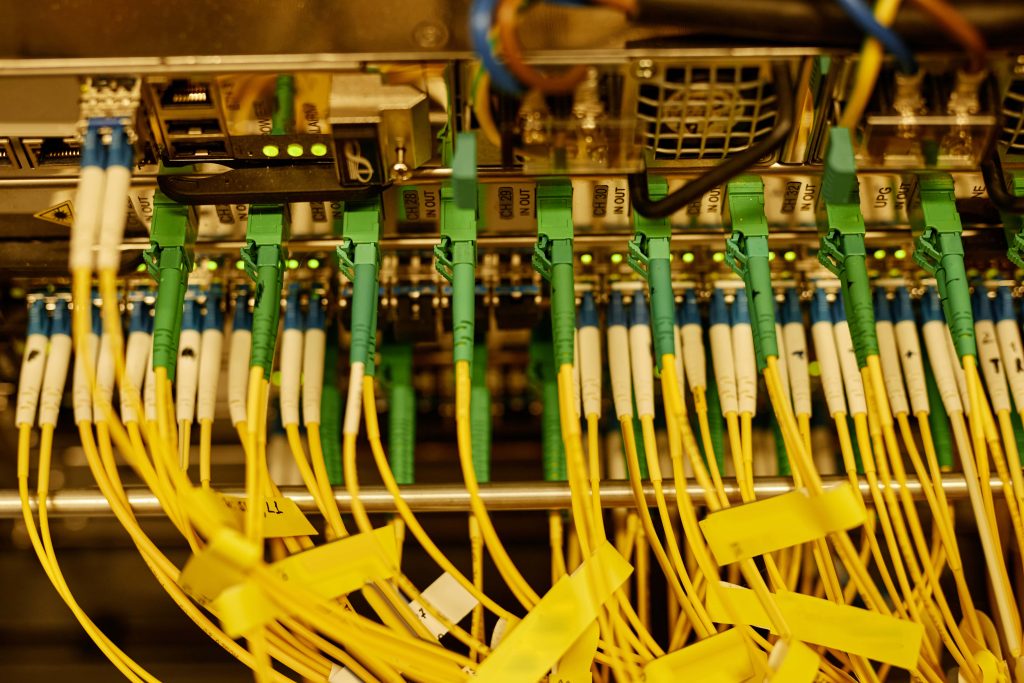
Understanding Fiber Connector Types and Cleaning Access Points
Not all fiber connectors are built—or cleaned—the same way. Each type has unique dimensions, ferrule materials, and locking mechanisms that affect how contaminants collect and how cleaning should be performed.
Understanding your connector type is the first step toward choosing the right cleaning tools and techniques.
Common Fiber Connector Interfaces
SC (Subscriber Connector)
- Square, push-pull design often used in telecom and enterprise networks.
- Durable but prone to dust buildup around the flat surfaces.
- Clean with one-click tools or lint-free wipes in a single, straight motion.
LC (Lucent Connector)
- Compact form factor used in high-density data centers.
- Smaller ferrule (1.25 mm) requires precise cleaning—avoid excess pressure.
- One-click pens are ideal for quick, repeatable cleaning.
ST (Straight Tip Connector)
- Twist-and-lock design common in legacy and military systems.
- Dust or debris on the spring-loaded tip can cause poor alignment.
- Use dry wipes or pen cleaners before each reconnection.
FC (Ferrule Connector)
- Threaded, screw-on design ensures stable connections in vibration-prone environments.
- Dirt trapped within the ferrule threads can degrade performance.
- Use cleaning sticks or cassette cleaners to remove debris thoroughly.
MPO/MTP (Multi-Fiber Push-On/Pull-Off)
- High-density connector carrying 8–24 fibers.
- Cleaning is more complex—use dedicated MPO cleaning tools that clean all fibers at once.
- Always inspect under magnification before reconnecting to ensure uniform cleanliness.
Ferrule End-Faces vs. Bulkhead Connectors
- Ferrule end-faces are exposed, making them easier to inspect and clean with dry wipes or click pens.
- Bulkhead connectors are recessed inside adapter ports and require narrow cleaning sticks or probe microscopes.
- Avoid inserting makeshift tools—fiber ports are highly sensitive and can be damaged easily.
Patch Cords, Pigtails, and Bare Fiber
Each fiber type requires its own cleaning approach:
- Patch cords: Clean before connecting or reconnecting; they can easily transfer dust between devices.
- Pigtails: Clean before fusion splicing—any contamination can affect splice alignment.
- Bare fiber: Extremely fragile; use precision swabs or wet-dry wipes before splicing or cleaving.
A good rule of thumb: if you handle it, inspect and clean it. Whether you’re working with SC connectors in a rack or MPO arrays in a backbone system, the same standard applies—clean before you connect.
Tools and Materials Required for Cleaning Fiber Optic Cables
Cleaning fiber optic cables isn’t just about wiping away dust—it’s about using the right tools and techniques to protect precision components. Using improper materials can leave residue, cause scratches, or permanently damage connectors.
Below are the essential tools every technician should have on hand, organized by cleaning method and environment.
Dry Cleaning Tools
Dry cleaning is the first and most common step for removing light contamination such as dust or lint.
- One-click cleaners / pen cleaners: Compact and easy to use for quick surface cleaning. Ideal for SC, LC, FC, and MPO connectors.
- Cassette or reel-based cleaners: Excellent for repeated use and cleaning multiple connectors in sequence.
- Lint-free fiber wipes: Designed to clean without scratching or leaving fibers behind—use a new section of the wipe for every pass.
Best for: routine maintenance, pre-connection checks, and clean environments such as labs or data centers.
Wet Cleaning Tools
When dry methods aren’t enough, wet cleaning removes oils, fingerprints, and stubborn debris.
- High-purity isopropyl alcohol (≥99%): Quickly dissolves oils and residue. Avoid lower-grade alcohols—they leave contaminants behind.
- Lint-free wipes or swabs: Moisten lightly (never soak) to prevent streaking or residue.
- Hybrid cleaners: Combine wet and dry phases for thorough cleaning without re-depositing debris.
Best for: removing oil-based contamination and field repairs where dust exposure is high.
Tools for Hard-to-Reach Areas
Some connectors sit deep inside ports or adapters, making them tricky to access safely.
- Adapter cleaning sticks / swabs: Slim, non-abrasive tools that reach deep ports and ferrules.
- Probe microscopes: Allow visual inspection of bulkhead connectors after cleaning.
- One-click cleaners for ports: Designed to fit inside tight adapters without damaging internal components.
Best for: data center panels, ODF frames, and recessed connectors.
Field and Portable Cleaning Kits
For on-site work, having a complete, portable kit ensures consistent results anywhere.
- Field cleaning kits often include one-click cleaners, wipes, alcohol, inspection scopes, and swabs.
- Handheld scopes or video probes verify that each connector is clean before reconnecting.
- Protective cases and dust caps keep tools and fibers contamination-free during transport.
Best for: technicians working across multiple sites or in uncontrolled environments.
Using the correct fiber optic cleaning tools doesn’t just improve signal quality—it prevents equipment damage, repeat service calls, and long-term connector wear.
A consistent, well-equipped cleaning routine ensures every connection meets performance standards.
Step-by-Step Guide – How to Clean Fiber Optic Connectors and Cables

Proper fiber optic cleaning isn’t guesswork; it’s a repeatable, standardized process. Following a consistent workflow ensures that every connection remains clear, stable, and ready for data transmission.
Step 1 – Inspect the Connector
Always start with an inspection.
Use a video inspection probe or fiber scope to check the connector end-face before cleaning. Look for:
- Dust particles or lint
- Fingerprint smudges or oil film
- Scratches or pitting on the ferrule
A pre-inspection prevents unnecessary cleaning and helps you spot physical damage early.
Step 2 – Choose the Right Cleaning Method
- Start with dry cleaning—it removes most loose contaminants.
- If the end-face still shows residue, move to wet cleaning.
- Avoid overhandling the connector or using unapproved materials such as cotton swabs or tissues, which can leave lint or scratches.
Step 3 – Dry Cleaning Process
- Use a one-click cleaner or reel cassette.
- Align the cleaner with the end-face and activate it once—never scrub back and forth.
- If using a wipe, drag the connector in one direction across a clean, lint-free surface.
- Re-inspect under the scope before reconnecting.
Best for: removing dust, lint, and light airborne particles.
Step 4 – Wet Cleaning Process
For stubborn oil or residue:
- Lightly dampen a lint-free wipe with ≥ 99% isopropyl alcohol.
- Gently wipe the connector in one straight motion.
- Immediately follow with a dry lint-free wipe to remove any moisture.
- Never dip the connector directly into liquid or apply alcohol to the port.
Best for: removing oils, adhesives, and static-bound dust.
Step 5 – Re-Inspect Before Connecting
- Always inspect again using a fiber scope or video probe.
- Check for any lingering dust, streaks, or moisture.
- If contamination remains, repeat the process using a new section of the wipe or a fresh click-cleaner cycle.
Skipping final inspection risks re-introducing debris into the entire link.
Pro Tip: The Inspect → Clean → Re-inspect Cycle
Follow this simple rule every time:
Inspect before cleaning, clean as needed, inspect again before connecting.
This closed-loop approach guarantees every connection meets optical standards for insertion loss and return loss.
Cleaning Fiber Optic Bulkhead Adapters and Inside Ports
Bulkhead adapters and inside ports are some of the most overlooked components during maintenance. Because they’re recessed and difficult to access, they often accumulate dust and oil that can transfer directly onto clean connectors, undoing all your previous cleaning efforts.
Proper cleaning of these internal interfaces is essential to maintaining stable network performance and preventing repeat contamination.
Step 1 – Use the Right Tools
Never insert unapproved or makeshift objects into a port.
Use adapter cleaning sticks, lint-free swabs, or one-click port cleaners specifically designed for fiber optic systems.
These tools are built to:
- Reach recessed ferrules safely
- Remove dust and oil without scratching
- Prevent static buildup or residue transfer
Best for: cleaning SC, LC, and FC adapter ports and patch panel sockets.
Step 2 – Clean the Port Gently
- Insert the cleaning stick or one-click cleaner straight into the port — avoid twisting at an angle.
- Apply light, even pressure; never force the tool.
- Rotate or click according to the manufacturer’s directions.
- Remove the tool and check for visible debris or residue.
If you’re using swabs, discard each one after a single use. Reusing tools can spread contamination rather than remove it.
Step 3 – Inspect and Verify
- Use a probe microscope or video inspection scope to visually confirm that the internal port is free from contaminants.
- Look for small reflective dots (dust) or dull streaks (residue) on the internal ferrule.
- If needed, repeat cleaning with a new tool.
Remember: a dirty adapter can instantly re-contaminate a clean connector the moment they’re mated.
Common Mistakes to Avoid
- Reusing swabs or cleaning sticks
- Over-wetting tools with alcohol
- Applying excessive pressure inside ports
- Skipping inspection after cleaning
- Using non-fiber-rated materials (like cotton tips or canned air)
Even a single mistake here can cause micro-scratches or moisture buildup that leads to signal loss or reflection.
Best Practices for Maintaining Clean Fiber Optic Networks
Dust, oil, and static can build up faster than expected, especially in high-density or high-traffic environments. The best way to ensure consistent performance is to make cleaning part of every technician’s routine.
Below are proven best practices for maintaining clean, reliable fiber optic systems.
1. Implement a “Clean Before Connect” Policy
Even new cables and connectors can carry invisible residue from manufacturing or packaging.
Adopting a strict “clean before connect” rule ensures contaminants never enter ports or adapters.
Always inspect and clean both sides — the connector and the port — before mating them.
Result: Reduced insertion loss and reflection across the network.
2. Standardize Cleaning Protocols
Create a clear Standard Operating Procedure (SOP) that outlines when, how, and with what tools connectors must be cleaned.
This minimizes variability between technicians and ensures every connection meets the same standard of quality.
Include:
- Defined cleaning intervals (daily, weekly, pre-connection, post-installation)
- Approved tools and materials list
- Inspection pass/fail criteria
Result: Predictable, repeatable performance across all maintenance teams.
3. Train and Certify Every Technician
Knowledge gaps lead to costly errors.
All field staff and installers should receive hands-on training in inspection and cleaning techniques.
Reinforce these skills through refresher sessions and internal certification.
Result: Fewer connection failures and less rework during maintenance cycles.
4. Store and Handle Cables Properly
Improper storage is one of the most common sources of contamination.
Always cap connectors when not in use, and store unused cables in sealed containers or dust-free bags.
Avoid touching ferrules or connector tips directly with your hands.
Result: Prevents debris and oil from transferring to active fibers.
5. Use Quality Inspection Equipment
Cleanliness can’t be confirmed by eye.
Equip every technician with fiber scopes, video probes, or handheld inspection devices that verify end-face quality before and after cleaning.
Investing in reliable inspection tools upfront saves thousands in downtime later.
Result: Confident, verified connections with documented proof of cleanliness.
6. Keep Tools Clean and Replace Them Regularly
Cleaning tools collect residue over time.
Replace clickers, wipes, and swabs according to manufacturer recommendations, and store them in clean, sealed containers.
Never reuse a dirty wipe or swab — it spreads contamination instead of removing it.
Result: Consistent cleaning efficiency and longer connector lifespan.
7. Document and Audit Your Cleaning Process
Track every cleaning activity in a log or maintenance record.
Periodic audits help ensure that technicians follow procedures and that tools remain in good condition.
Over time, this documentation becomes valuable data for predictive maintenance.
Result: Better network reliability, traceability, and compliance with industry standards.
Final Takeaway
Maintaining clean fiber optic networks isn’t just about cleanliness — it’s about protecting performance, uptime, and long-term investment.
With consistent cleaning, proper training, and documented procedures, your team can keep every connector operating at peak efficiency.
Frequently Asked Questions:
1. Why is cleaning fiber optic cables and connectors so important?
Even microscopic dust, oil, or residue can cause significant signal loss, reflection, or damage to fiber optic equipment. Proper cleaning ensures low-loss connections and protects sensitive components during splicing or installation.
2. How often should fiber optic connectors be cleaned?
Fiber connectors should be cleaned every time before making a connection or splice—even if they’re brand new or capped. A “clean before connect” policy helps prevent contamination from dust or handling.
3. What tools are recommended for cleaning fiber optics?
Common tools include:
- Dry cleaners (one-click pens, cassette cleaners)
- Wet cleaners (lint-free wipes + ≥99% isopropyl alcohol)
- Inspection scopes for verifying cleanliness
- Adapter swabs for cleaning inside bulkhead ports
4. What’s the difference between wet and dry cleaning methods?
- Dry cleaning is used for light contamination and is the preferred first step.
- Wet cleaning is ideal for stubborn residues or oils but must be followed by a dry wipe to prevent residue.
- Always inspect after cleaning to ensure success.
5. Can I use household items like cotton swabs or tissue to clean fiber connectors?
No. These materials can leave lint, scratch the ferrule, or introduce new contaminants. Always use professional-grade fiber optic cleaning tools designed for precision and minimal particle shedding.
6. How do I clean bulkhead connectors or ports?
Use specialized cleaning sticks or swabs designed for inside connectors. Insert gently and rotate according to the product’s instructions. Never insert unapproved tools or touch the inside of a port directly.
7. What are common mistakes to avoid when cleaning fiber optics?
- Reusing dirty wipes or swabs
- Over-saturating with alcohol
- Skipping inspection before connection
- Touching fiber tips with bare hands
- Failing to protect cleaned connectors with dust caps